Category Archives: Amazon Web Services

Backups of your S3-backed Nextcloud Server

In the previous post we created an S3-backed Nextcloud server on Amazon Web Services.

This post will explain how backup such your server and how to restore those backups. In fact, we will be making a full-fledged clone of your existing Nextcloud server. Such a clone is useful as a backup, but you can also use it to test risky configuration changes before applying them to your real server.

In a nutshell, the cloning/backup process works like this:

  1. Take a snapshot of the virtual machine (including Ubuntu, Nextcloud and all the configuration data)
  2. Copy the data in S3 to another bucket
  3. Create a new virtual server based on the snapshot from step 1
  4. Point the new virtual server to the new S3 bucket from step 2
  5. And voilà: you now a have a clone of your original Nextcloud server

Let’s see how this works in detail.

Step 1: Take a snapshot

Before we can take the snapshot, we need to shutdown the server properly to avoid inconsistencies.

  1. Log in to your server via SSH
  2. Put Nextcloud into maintenance mode with the following command; this will prevent users from making any further changes to Nextcloud’s database
    sudo nextcloud.occ maintenance:mode --on
  3. Stop Nextcloud entirely with the following command:
    sudo snap stop nextcloud
  4. If the command times out, simply execute it again until you get “stopped” as a response.
  5. Go into the Lightsail web console and stop the entire server; make sure to wait for the server to reach the status “Stopped”.
  6. Now we are ready to take the snapshot: In the Lightsail web console, go to “Manage -> Snapshots” for your server
  7. Give the snapshot a name of your choice, then click “Create snapshot”.

While we are waiting for the snapshot to be taken, let’s do the backup of your S3 data.

Step 2: Backup S3 Data

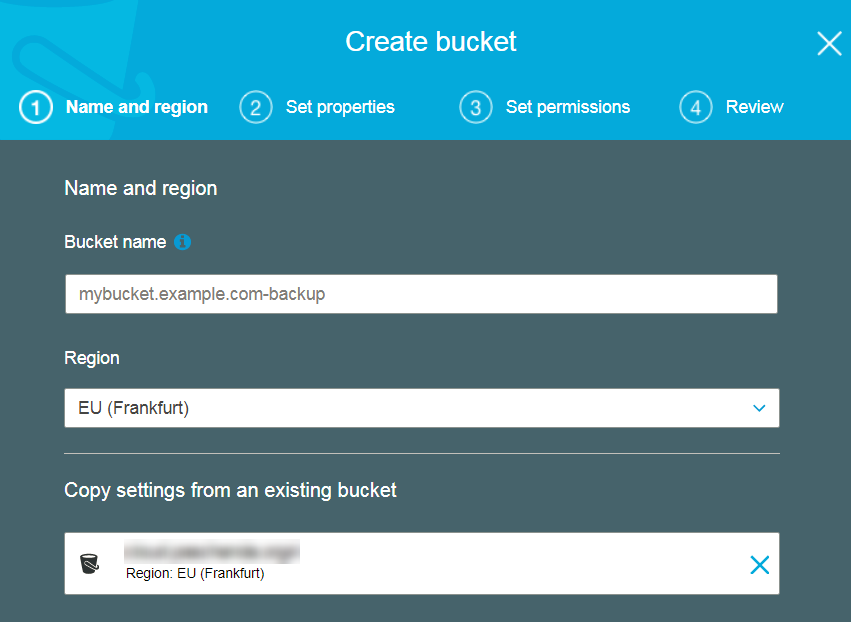
  1. In the Amazon S3 web console, create a new bucket to hold the backup of your data; make sure that the new bucket is in the same region as your original bucket (otherwise you have to pay inter-region transfer cost).
    Note that you don’t have to go through all the steps of the bucket creation wizard; after entering your bucket name and choosing the region, you can simply click the Create-button in the first screen.
  2. Now we have to copy the data from your existing S3 bucket to the new bucket. To do this, we will use the AWS Command Line Interface (AWS CLI). If you have not yet installed/configured it on your machine, follow this guide from Amazon.
  3. Assuming that you have the AWS CLI installed and configured, simply type:
    aws s3 sync s3://oldbucket s3://newbucket

    Of course you need to replace oldbucket and newbucket with the respective bucket names.

  4. Once the command completes, you have an exact copy of all your Nextcloud data in newbucket.

Step 3: Create a New Server from the Snapshot

  1. Go back to the AWS Lightsail web console and make sure that the snapshot of your server is now completed.
  2. Open the menu next to the snapshot and click “Create instance”, to create a new server based on the snapshot.
  3. Once your new server is up and running, go to “Manage -> Networking” to assign it a static IP address and open the HTTPS port on the firewall.
    Note down the IP address, we will need it soon.

Step 4: Point the New Server to the New S3 Bucket

  1. Log in to your new server via SSH
  2. Open /var/snap/nextcloud/current/nextcloud/config/config.php for editing:
    sudo nano /var/snap/nextcloud/current/nextcloud/config/config.php
  3. Look for the section named trusted_domains and change the IP address to the static IP address that was assigned to the new server.
  4. In the section named objectstore, change the S3 bucket name to the bucket that holds the copy of your S3 data.
  5. Save the config.php and restart Nextcloud with:
    sudo snap restart nextcloud
  6. Visit you new Nextcloud server in your browser, using the static IP address; you should see the login dialog of Nextcloud
  7. Verify that you can login and as a last step, disable the maintenance mode:
    sudo nextcloud.occ maintenance:mode --off
  8. Great job! You now have a fully working clone of your original Nextcloud server 🙂
  9. … speaking of which, we should probably start your original server again, so start it again via the AWS Lightsail web console, then log into it via SSH and disable the maintenance mode.

Considerations

Having a fully working clone of our Nextcloud server available is great, but in terms of convenience and cost, it still leaves some things to be desired:

  1. The backup is a manual process and I am a lazy person. So backups probably won’t occur as frequent as they should. To remedy this, the backup should be automated. This is very much possible, but it requires some effort.
  2. With this backup strategy, we have doubled our storage costs, since we have just cloned all S3 data to a second bucket. A more cost-effective strategy would be to store the backup in AWS Glacier, which storage cost is just $0.0045 per GB/month. This is just 20% of S3’s $0.0245 per GB/month.
    However, the cost structure of Glacier also complicates matters a bit: in Glacier, you also pay a fee per retrieval request. Retrieving a tens of thousands of small files is more expensive than retrieving one large file. It is also much more cumbersome. This means that we should compress your S3 bucket into one large zip file before storing it in Glacier. For this, we have to download the files from S3 and zip them locally. This may require a large harddisk if we have a lot of data in S3.
    We also have to deal with Glacier’s somewhat special usability: in Glacier, retrieving a file takes multiple hours and hence goes through a couple of indirections.
    All of these things can be dealt with, but they require some effort – especially if the solution is to be automated.

There is still room for improvement, but for now I am happy to have a working backup.

Setting up Nextcloud on Amazon Lightsail with an S3 Backend

This post will explain how to setup a Nextcloud server on Amazon Web Services with the following features:

  • based on a virtual Linux server in the Cloud (AWS Lightsail)
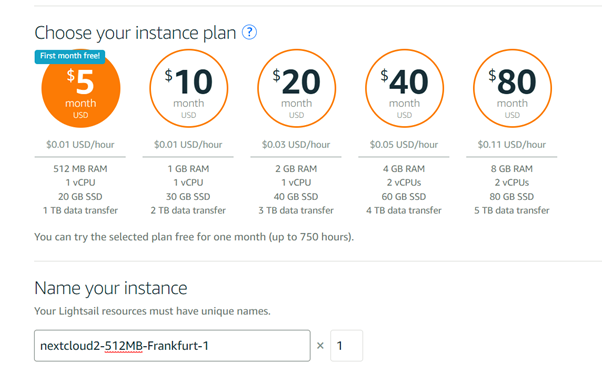
    AWS Lightsail is an easy-to-use service from Amazon that let’s you spin up a virtual server in less then a minute; the cheapest one is 5 USD/month
  • uses AWS S3 as a storage backend
    AWS S3 is Amazon’s object storage solution; I use it here due to its low cost (100 GB is just 2.45 USD/month)
  • is reachable via the internet at a subdomain of your choosing (e.g. mycloud.example.com)
  • supports HTTPS with CA-signed certificates from Let’s Encrypt
    Let’s encrypt provides free CA-signed certificates for the average person; they are sponsored by Mozilla, Google and others

This post is split into several parts – here is an outline:

  • Part 1: create a virtual Linux server on AWS Lightsail
  • Part 2: generate credentials for AWS S3
  • Part 3: install and configure Nextcloud
  • Part 4: point your subdomain to the virtual server
  • Part 5: enable HTTPS and create certificates


Part 1: Create the virtual server

First, we need to create a server. We will be using a small virtual Linux server which runs Ubuntu.

    1. Log in to AWS Lightsail; create an account if you don’t have one.
    2. Create a new Linux instance running Ubuntu


    3. Your instance should be up and running after a minute or so. To verify this, you can log in to the instance via SSH using the console-button in in Lightsail:


    4. Before we start playing with the instance though, there are two more things to do: In the web console, go to manage -> networking to see the network settings for your instance:


    5. Add HTTPS (port 443) to the list of open ports; this will allow incoming connections via HTTPS
    6. Click the button “Create static IP” to get a public IP address that never changes. If you skip this step, Amazon might change your instance’s public IP address during a restart. This would mess up the DNS settings we will put in place later.
    7. Note down the static IP address; we will need it later.

    Part 2: Create a user for AWS S3

    Since we want to use AWS S3 as a storage backend, we need to give your new instance access to the S3 service. We will do this by creating a new user and getting the so-called API-Access Key. This key will then later be used to configure Nextcloud.
    To get your API access key, do the following:

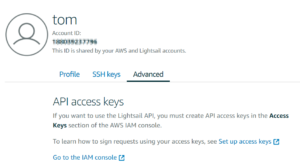
    1. In the Lightsail web page, go to Account -> Advanced; click the link Go to the IAM console


    2. In the IAM console, go to the Users-section and click Add User


    3. Create a new user with the following settings:
      • Username: nextcloud (you can also pick something else if you like)
      • Access type: Programmatic access
    4. Click “Next: Permissions”


    5. Select “Attach existing policies directly”
    6. Filter for “S3” and select AmazonS3FullAccess
    7. Click “Next: Review” and then “Create user”
    8. The new user will be created and Amazon shows you the security credentials. Copy the access key ID and the secret access key – we will need those later.


      Make sure to copy those NOW. Amazon will not show you the secret access key again.

    Part 3: Install Snap, Nextcloud and configure S3 access

    In Part 3, we will install Nextcloud and configure it for access to S3. For installing Nextcloud, we will use the pre-packaged Nextcloud Snap. This already comes pre-configured and brings all its dependencies. Plus, it contains an easy-to-use script to add certificates  for HTTPS later.

    1. In the AWS Lightsail web console, click the console-button to login via SSH.
    2. First, we need to install Snap; Snap is a kind of container/package manager that runs software bundles including all their dependencies; it also keeps those bundles up-to-date automatically. To install snap, simply type:
      sudo apt update
      sudo apt install snap
    3. Once snap is installed, we can install the Nextcloud Snap:
      sudo snap install nextcloud
    4. Before doing anything else, we need to configure Nextcloud to use S3 as primary storage. To do this, add the following section to /var/snap/nextcloud/current/nextcloud/config/config.php:
      'objectstore' => array(
        'class' => 'OC\\Files\\ObjectStore\\S3',
        'arguments' => array(
          'bucket' => '<choose a bucket name>',
          'region' => '<region where your instance resides, e.g. eu-central-1 for Frankfurt>',
          'autocreate' => true,
          'key' => '<your API key from part 2>',
          'secret' => '<your API key secret from part 2>',
          'use_ssl' => true
        ),
      ),

      A couple of notes on this:

      • Nextcloud will automatically create the S3 bucket you specify in the region that you specify
        Make sure that the S3 bucket and the instance are in the same region to avoid paying cross-region data transfer cost
      • The so-called bucket name is S3-terminology for a folder.
        This name needs to be unique (like an e-mail address). So just using “nextcloud” is not going to work.
        I recommend something like <mycloud.example.com-currentdate>.
      • To edit the config file, you need root-permissions
      • it is important to make this setting BEFORE setting up the admin account for Nextcloud. The reason is that changing the primary storage breaks all user profiles in Nextcloud – this includes the admin profile (see this Issue in Nextcloud’s github for more details).
    5. Now we are ready to setup the Nextcloud admin account and make Nextcloud ready-to-run: In the SSH console type:
      sudo nextcloud.manual-install admin <admin password of your choosing>
    6. Finally, let us add the domains from which Nextcloud will be served. Open config.php for editing again (it looks different this time due to the installation in the previous step).
    7. In config.php, find the section for trusted_domains. Add the IP address of your instance and also the domain:
      'trusted_domains' => array (0 => 'localhost', 1 => '111.122.133.144', 2 => 'mycloud.example.com',),
    8. Restart the Nextcloud snap with
      sudo snap restart nextcloud
    9. Open a browser and visit your IP address: http://111.122.133.144. You should see the login page for Nextcloud. You should be able to login with your admin password.

    Part 4: Setup Subdomain

    In this chapter, we will point your subdomain (e.g. mycloud.example.com) to the virtual instance’s static IP address. I assume here that you already have a domain registered (e.g. example.com). How exactly this works highly depends on the provider you used for registering the domain. Hence I can only provide an abstract description here:

    1. Go to your domain registrar website (the company where you got the domain) and log in
    2. Open the DNS settings for your domain (example.com)
    3. Create a new A-record that points the subdomain (mycloud.example.com) to the static IP address (111.122.133.144) of your instance, i.e. the A-record should have the following properties:
      • Type: A
      • Name: mycloud
      • Data: 111.122.133.144
    4. It might take a while until this new information has propagated through webservers. You can check whether it works by visiting https://www.dnswatch.info/. If you type in your subdomain, and hit the resolve button, it should come up with your instance’s static IP address.
    5. Try to visit your subdomain with a browser; you should see the Nextcloud login page.
      Make sure that this works before attempting to setup HTTPS, otherwise the HTTPS setup will fail.

    Part 5: Setup HTTPS

    Setting up HTTPS involves two steps: configure Nextcloud to listen on the HTTPS port (i.e. 433) and creating a CA-signed certificate for your domain. Luckily the Nextcloud snap comes with a script for this:

    1. Log in to your instance via SSH (through the Lightsail web page).
    2. In the console, type the following command and follow the instructions
      sudo nextcloud.enable-https lets-encrypt
    3. To confirm that HTTPs works correctly, point your browser to https://<your subdomain>. You should see the Nextcloud login page.

    Aaaand that’s it. Now you can install the Nextcloud client and point it to your subdomain to sync files and folders directly to your hard-drive.

    Additional Info

    Keeping Ubuntu and Nextcloud up-to-date

    Actually, you should not have to worry about updating your machine:

    • the Ubuntu installation comes with a package named unattended-upgrades, that automatically installs security patches
    • Snap should automatically keep Nextcloud updated as well

    Starting/stopping Nextcloud (and related services like MySQL)

    sudo snap stop nextcloud
    sudo snap start nextcloud

    For a complete list of snap commands, type snap help.